Making Arduino bike lights

Bare SlimBIKE V1 PCB

Cycling is my main form of transportation which often means I’m travelling at night, hoping other road users can see me as I ride along. I used cheap LED lights for a while, but the batteries either ran out too quickly, or their light output was sub-par. I looked around for a better more expensive set but ended up – foolishly – deciding I could do a much better job myself.

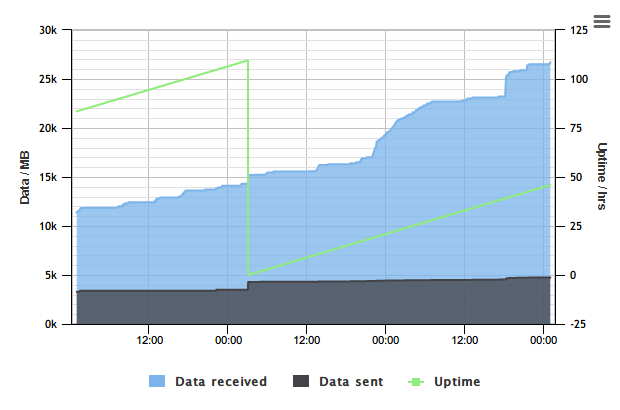
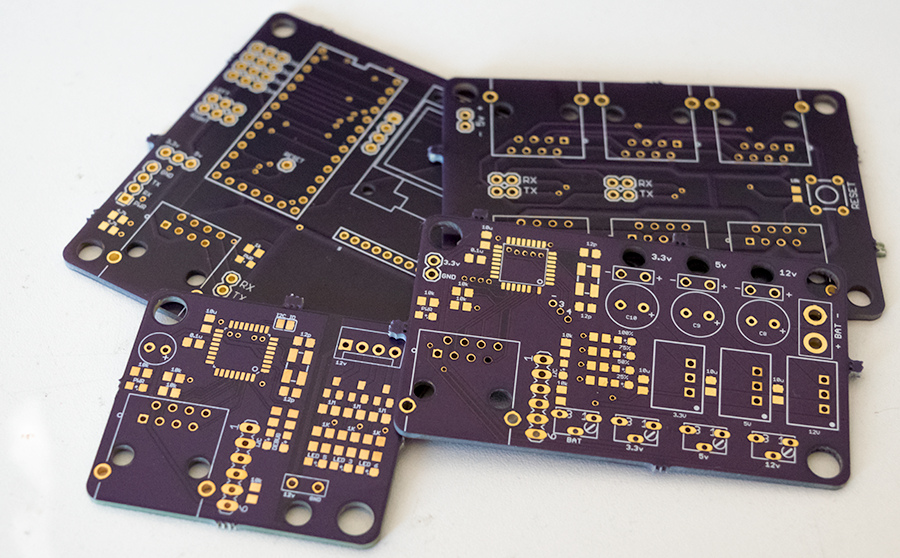
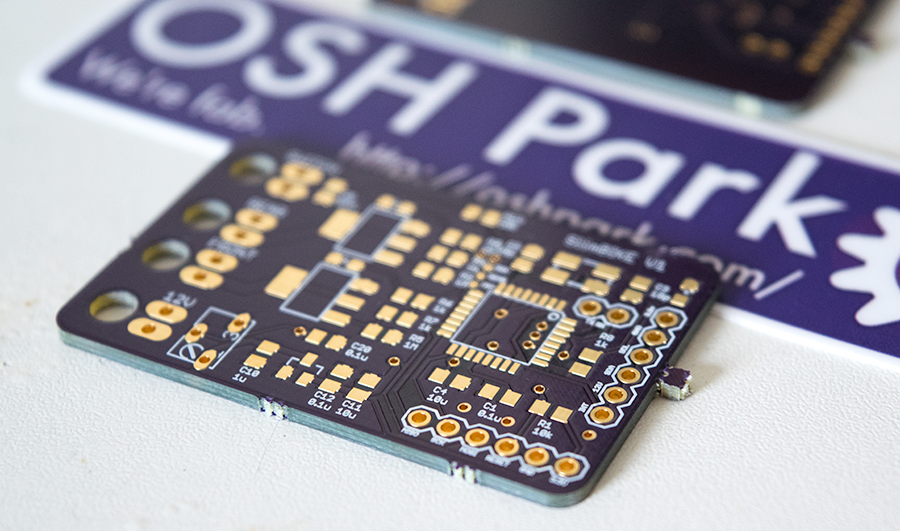
The first iteration was an Arduino Fio with a stripboard MOSFET driver board which lead to my discovery of OSH Park and – after a few months of experimentation and feature-creep – I ended up with a GPS RTC enabled board reporting its position and battery level back through a GPRS module. This board eventually suffered a catastrophic failure which I’m still unsure why it happened, but I was left without lights which was my biggest concern. Continue reading Making Arduino bike lights

BT Home Hub 5 usage – follow up

The BT Home Hub project is now almost finished, its just the last few quirks to work out and fix. For the last time, I’ve added a new module to my monitoring dashboard which allows me to see usage against time.

A spike in sent and received usage @ 2am

While checking out whether this page was working, I noticed an interesting spike in both sent and received traffic…

Continue reading BT Home Hub 5 usage – follow up

Making a radio controlled tank – Part 2 – PCBs

With the mechanics somewhat decided on, the control circuitry was the next on the list. After ‘mastering’ radio control, temperature sensing and internet connectivity, I was pretty well versed with the Arduino ecosphere, and felt pretty comfortable making my own PCBs with the help of OSHPark.

I felt the tank needed multiple separate boards, not only to compartmentalize functionality but to work around the maximum board size in the free version of Eagle I was using to design the circuit boards. After much deliberation, I settled on 4 boards; control, connectivity, LED, and power.

Continue reading Making a radio controlled tank – Part 2 – PCBs